In the previous article we discussed what Laravel is and what are its many features, and what you need to start developing your first website or web application with Laravel. Now you are ready to start developing, however before you do that, you first need to set up Laravel and its requirements for your work environment.
At the time of writing this article, the latest Laravel release is 9.x, so we will focus on this release and its requirements, some of the requirements might change in the future, but the process of setting it up should be the same
Laravel Requirements
PHP, Web Server and MySQL
Laravel is based on PHP, which needs to run on a web server. There are several methods to setup a web server on your PC or Mac, however as this article is directed towards beginners, we recommend installing a local web server on your computer. The most famous ones are:
These local web servers will install the Apache web server for you, plus installing other requirements like PHP and MySQL. Laravel 9.x requires PHP 8.0 or higher to run, so please be sure to select the right PHP version. Also it is recommended that you install the latest available MySQL release.
Composer
Composer is a dependency management software for PHP, it is required by Laravel to install and track its dependencies. To install Composer on your computer visit https://getcomposer.org/ and select your platform, download the installation files and follow the instructions.
NodeJS
NodeJS is a JavaScript runtime environment that is required by Laravel. You will not use NodeJS by yourself, however Laravel will use it in the background. You can install NodeJS by downloading it from the website https://nodejs.org/ .
IDE
The IDE is the code editor you will use to write your code, our recommendation for beginners is to use either Visual Studio Code which is a free editor developed by Microsoft. Or PHPStorm, which is a professional paid code editor dedicated to PHP projects and can be considered the best option for Laravel development. So based on your budget you can choose either of them.
Your First Laravel Project
If you followed the steps above, you are ready to start your first Laravel project. If you installed a local web server as recommended, be sure to start it before you continue.
Open your terminal app and enter the following command:
composer create-project laravel/laravel laravel-testThis command will take a couple of minutes to create a new project, called “laravel-test” and download all the required dependencies, please wait till it finishes the installation process. Finished? Great, let’s run our project and see how it looks.
To run the newly created project, run these commands in your terminal:
cd laravel-test
php artisan serve
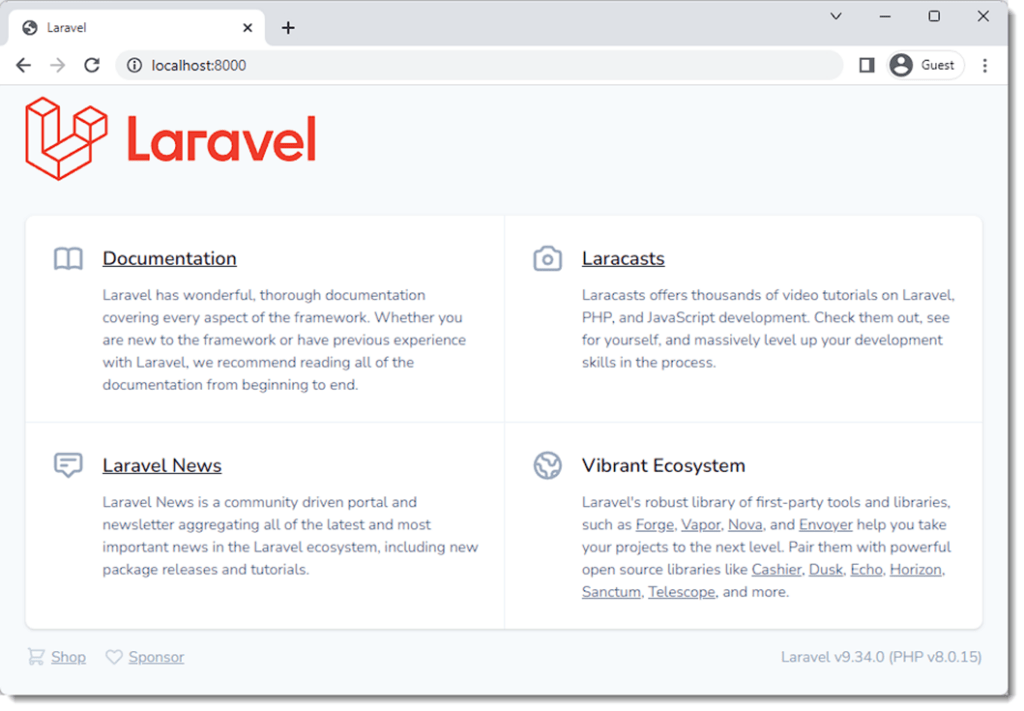
The first command is simple, it will get you into the folder created for this project, so you can run it. The second command is where the magic starts, this will run a web server and run your application in it. To browse your new website open your preferred browser and type the URL: http://localhost:8000/, this will open the default Laravel welcome screen. (remember, we didn’t code anything yet).

Great, we have something here. But where does this default page come from? We want to change it to show our own information, right? Ok, the default view for Laravel is called welcome.blade.php and can be found in the folder /resources/views. The below screenshot shows the default structure of a new Laravel project. And the red arrow points to the location of the welcome.blade.php file.

Now if we want to change the welcome screen, let’s remove everything in the default welcome page, and put our own code as below.
<body >
   <h1>Welcome to our Laravel test project</h1>
   <div>
       This is our first page in our new Laravel test project, we will improve it with time.
   </div>
</body>
And now, refresh the project page in the browser. Hurray, your own custom page is displayed.

But wait, we want a full dynamic website. We didn’t use the amazing Laravel framework, just to display a static page, we need to have a database where we store our site’s information, dynamic pages, user authentication and more, right? Let’s see how we can do this.
Configuring the database
Almost any dynamic interactive website needs a database, Laravel makes it very easy to connect and handle your website’s database, all you need to do is create a database, configure it in the Laravel project and it will do all the heavy lifting.
To create a database, open your browser and type the URL: http://localhost/phpmyadmin/ , assuming you already configured MySQL engine correctly on your machine you will now see the phpMyAdmin interface, which is an administration tool for MySQL databases, where you can create, edit and manage your MySQL databases.
To create a new database, open the databases tab, click on New, then in the Database name field, type the name of your database, let’s call it the same name as our project “laravel-test”

Once the database is created, we need to configure it in Laravel, to do so, open the file called .env in the root directory of your project, and change the following lines to match the values in this example:
...
APP_NAME="Laravel Test"
...
DB_CONNECTION=mysql
DB_HOST=127.0.0.1
DB_PORT=3306
DB_DATABASE=laravel-test
DB_USERNAME=root
DB_PASSWORD=
...
Now, if you refresh your website, you will find that nothing has changed. We added the database but we haven’t used it yet. And our code is still static. So let’s learn how to use the database.
Let’s Start
Now we will start building our application. We will design a simple library management system, where we want to store and display information about books, like the book name, its author, and ISBN number.
Create a model
Our first step is to create a model called Book. To do so we will use the following command:
php artisan make:model BookArtisan is the command line interface included with Laravel, that provides a number of helpful commands that can assist you while you build your application. We will use it a lot in our journey with Laravel, so try to memorize these commands.
The above command is self-explanatory, it will make a model called Book. and will create a file called Book.php inside the App/Models folder. And that’s all you need to do to create a model.
Open the Book.php file, and add the below highlighted line, this line tells Laravel that the 3 properties: name, author and ISBN are fillable by the model creation command.
<?php

namespace App\Models;

use Illuminate\Database\Eloquent\Factories\HasFactory;
use Illuminate\Database\Eloquent\Model;

class Book extends Model
{
    use HasFactory;
    protected $fillable = ['name', 'author', 'isbn'];
}
Adding a table (migration)
Each model represents a table in the project’s database. So let’s create the books table in the database. Laravel has a neat methodology for table creation called migrations, which keeps your table creation, deletion and changes very easy and trackable, especially if you work in a team. So let’s create our first table migration, by the this command:
php artisan make:migration create_books_tableImportant: Always make sure your table name is in the plural tense of your model’s name in small letters.
This will not create a table in the database directly, but will rather create a migration file in the database/migrations folder, the file will be named with the current timestamp and the name you gave in the previous command.
Open the migration file in your IDE, and let’s add the fields of the books table inside the Schema::create method, the file should look like this:
<?php

use Illuminate\Database\Migrations\Migration;
use Illuminate\Database\Schema\Blueprint;
use Illuminate\Support\Facades\Schema;

return new class extends Migration
{
    /**
     * Run the migrations.
     *
     * @return void
     */
    public function up()
    {
        Schema::create('books', function (Blueprint $table) {
            $table->id();
            $table->string('name', 100);
            $table->string('author', 50);
            $table->string('isbn', 13);
            $table->timestamps();
        });
    }

    /**
     * Reverse the migrations.
     *
     * @return void
     */
    public function down()
    {
        Schema::dropIfExists('books');
    }
};
We added 3 fields to our table. name, author, and isbn. all of them are recorded as text (string). Note that although ISBN consists of numbers, it should be stored as a string, as it will not be treated as an actual number. But a string of digits. One of the main reasons is that it can start with the digit 0, if it is stored as an integer, this leftmost zero will be omitted, and we don’t want that.
Note that we added only the 3 lines highlighted with blue. Laravel pre-filled the other 2 fields id() will add a primary key (serial number, or identifier) to your table. And timestamps() will add the 2 fields (created_at & updated_at).
Now the migration is complete, and we are ready to add the table to the database, this step is called “migrate”, which is done by the command below:
php artisan migrateThis will create the table books in the database, as we defined in the migration file.
Now what?, we need to create web pages to enter and view the books. So let’s do that.
Views
Views in Laravel represent the frontend part of the application, they are basically HTML files that use the Blade templating engine that comes included with Laravel.
In our simple project we will need only 2 views (web pages), one to enter the data, and the other to list them. For the sake of simplicity, we will not bother with any formatting, just basic web pages. And later in this series we will dive more in the blade templates engine and how we can benefit from its rich features.
So now head to the /resources/views folder, delete the default welcome.blade.php and create 2 new files index.blade.php and create.blade.php. The index file will be responsible for listing all books in a table. Here is the code:
<!DOCTYPE html>
<html lang="en">
<head>
   <meta charset="utf-8">
   <title>Book List</title>
</head>
<body>
    <div style="padding-bottom: 20px">
        <h1>List of our books</h1>
        <a href="/create">Add a book</a>
    </div>
   <table style="width: 100%;" border="1" cellspacing="1">
       <tbody>

       <tr>
           <th>ID</th>
           <th>Name</th>
           <th>Author</th>
           <th>ISBN</th>
       </tr>
       @foreach(App\Models\Book::all() as $book)
           <tr>
               <td>{{$book->id}}</td>
               <td>{{$book->name}}</td>
               <td>{{$book->author}}</td>
               <td>{{$book->isbn}}</td>
           </tr>
       @endforeach
       </tbody>
   </table>
</body>
</html>
We will not explain the HTML code now, but this code will read all the books from the books table, iterate through them, and put them in a table. Please realize the @foreach … @endforeach directives, anything in between the 2 phrases will be repeated for each item in the table (book in our example).
Also another important part to notice are the terms inside the double curly brackets {{ … }}, they are part of the blade templating system, anything inside these brackets is a php variable that will be replaced with its value when the page is displayed, so {{$book->name}} will be replaced with the name of this book.
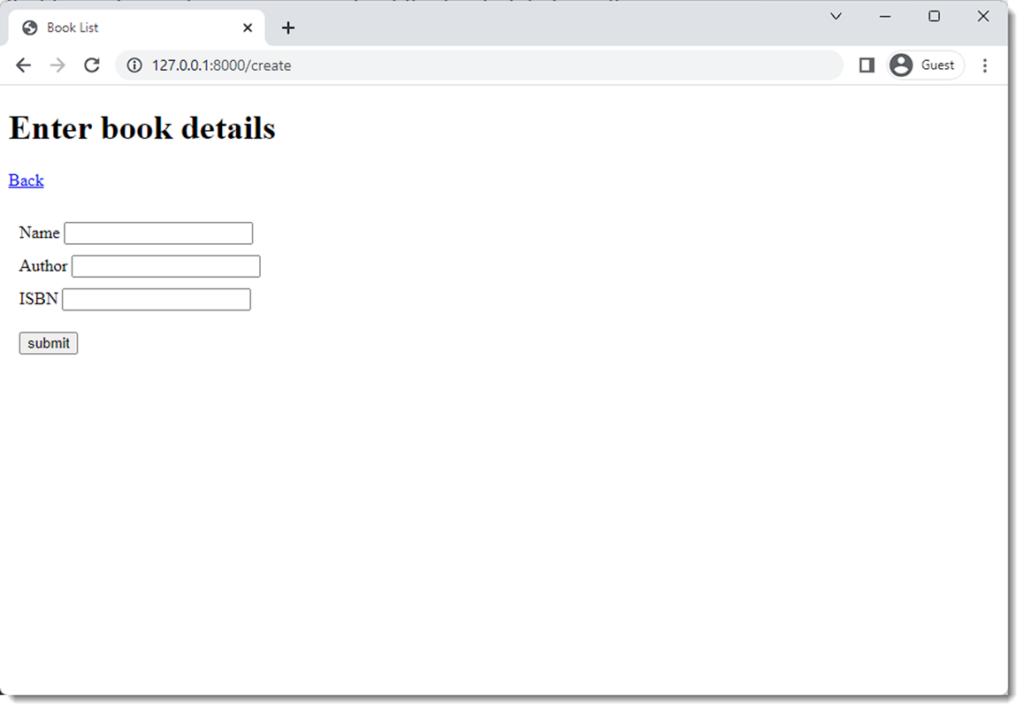
The create file will be the data entry page, it will have a form where we enter the details of the books. Here is the code you should follow:
<html>
<body>
<div style="padding-bottom: 20px">
    <h1>Enter book details</h1>
    <a href="/">Back</a>
</div>
<div>
    <form action="/create" method="post">
        @csrf
        <div style="margin: 10px">
            <label for="name">Name</label>
            <input type="text" name="name" id="name">
        </div>
        <div style="margin: 10px">
            <label for="author">Author</label>
            <input type="text" name="author" id="author">
        </div>
        <div style="margin: 10px">
            <label for="isbn">ISBN</label>
            <input type="text" name="isbn" id="isbn">
        </div>
        <button type="submit" style="margin: 10px">submit</button>
    </form>
</div>
</body>
</html>
This code is a very basic HTML page that has a form where you can submit the book details, nothing special here at all. But what does @csrf here mean? This is a directive that will add a token called Cross Site Request Forgery to our form, this token is used to protect your website from malicious attacks. For now, all you need to know is that you need to put this directive in all your submit forms.

Routing
We created our 2 web pages, However our application doesn’t know how to access them yet, so we need to define routes to our pages. By default, routes in Laravel are defined in the routes/web.php file. We will need to define our routes in that file. We will use the simplest form of routing in Laravel, which is done using closures. Here is how our route file will look like:
<?php

use Illuminate\Http\Request;
use Illuminate\Support\Facades\Route;

Route::get('/', function () {
    return view('index');
});

Route::get('/create', function () {
    return view('create');
});

Route::post('/create', function (Request $request) {
    App\Models\Book::create([
       "name" => $request->name,
       "author" => $request->author,
       "isbn" => $request->isbn,
    ]);
    return view('index');
});
This code defines 3 routes:
- The first route is the index route “/” this route will open when you type the URL of your site. In our small project, it will open the index.blade.php view file, which contains the list of books.
- The second route will call the “/create” page, which will load the create.blade.php view we created earlier, where we can add our books to the table.
- The third and final one is a POST route. Which will be used by our create form, to submit the data to the server, this route will receive the request, and process it. As you can see in the code, it will read the book parameters from the request and use them to create it in the database. Then it will return us to the index page after that.
Now our small application is complete, load the website with the url http://localhost:8000/ to test it, if your web server is not running, you will need to load it by the command php artisan serve as explained earlier.
When you load the website for the first time, you will have an empty table, we didn’t put any books yet in the database. Click on the Add a book link, it will open the create page. Now start adding some books, and see how each time you add a book, it will be added to the table. We succeeded in our task.
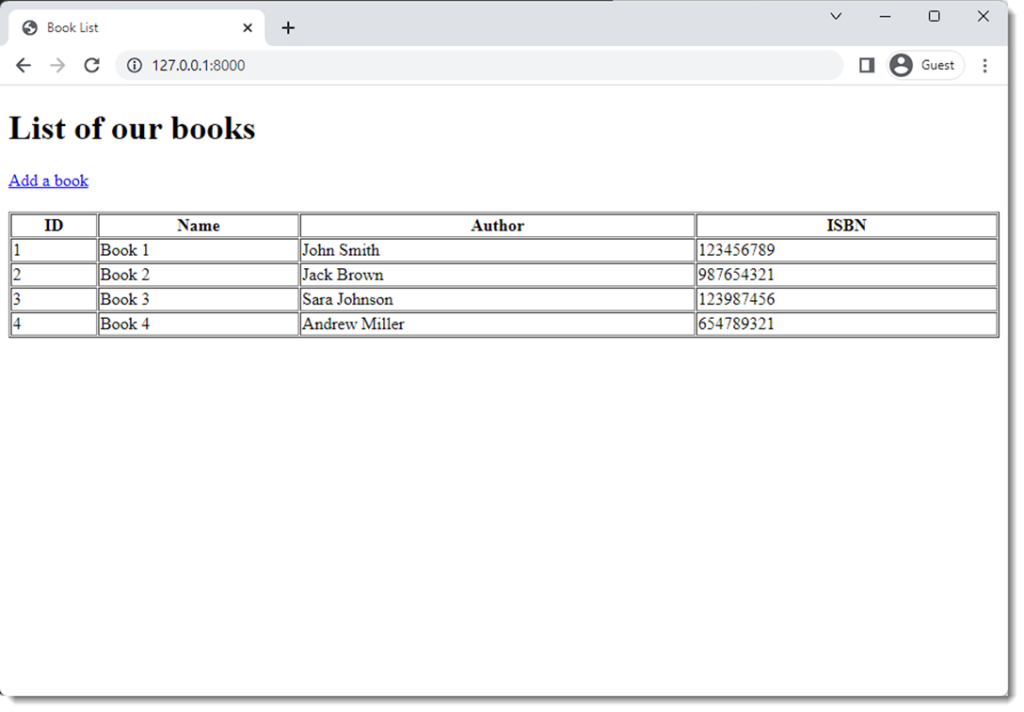
Here is how our index page will look like after adding 4 books.

Conclusion and the way forward
Congratulations, you created your first Laravel project. A very simple and basic one of course, but it is the first step of the journey. We learned how to create a new project. How to configure a new database for the project. We created a model, a migration, and views for our data to create and show. And at the end we defined the routes.
But what if the user entered the book’s data incorrectly, maybe he left the fields empty, or added letters to the ISBN where it should have only digits. We need to detect this and prevent it. This is called data validation, we still need to learn how to validate the data submitted before adding it to the database.
Also remember in the previous article when we talked about the MVC architecture, we created the M “Model” and the V “Views”, but we didn’t create the C “Controller” yet, which will be needed to add more complex code and data processing for our data before storing in the database or displaying to end users.
In the next article we will discuss the controllers and data validation, and other more concepts that you will need to learn in your Laravel journey, so do follow us.


